 Kymco Agility 50 - Service manual > Front brake
Remove the front wheel.
Remove the front brake panel.
INSPECTION
Measure the brake drum I.D.
Service Limit: 111mm replace if over
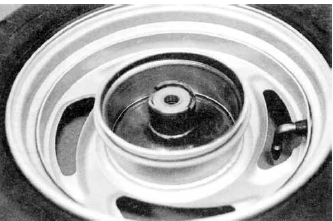
Measure each brake lining thickness.
Service Limit: 2.00mmmm replace if below
Keep oil or grease off the brake linings.
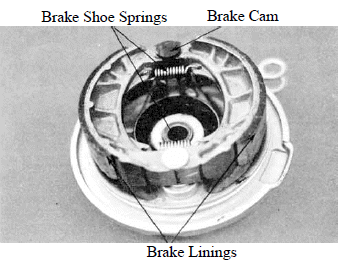
DISASSEMBLY
Do not swing the brake arm to expand the brake shoes.
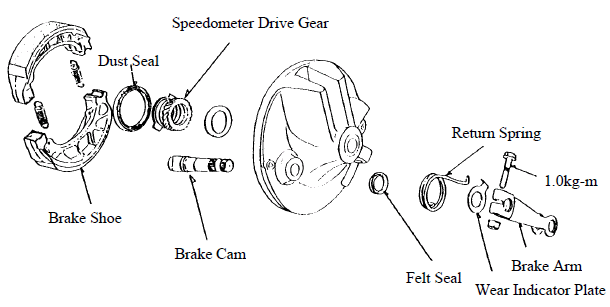
Remove the brake shoes by removing the brake shoe springs using a screw driver.
Remove the brake arm and return spring.
Remove the wear indicator plate and felt seal.
Remove the brake cam.
Remove the dust seal and speedometer drive gear.
ASSEMBLY
Apply grease to the speedometer drive gear and then install it into the brake panel.
Apply grease to the dust seal lip and install it into the brake panel.
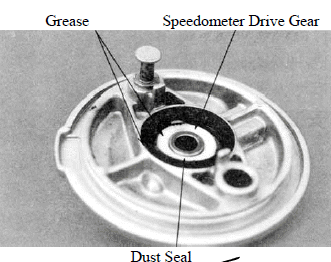
Apply grease to the anchor pin and brake cam.
Install the brake cam.
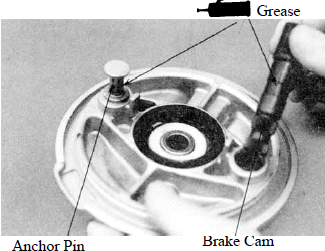
Install the return spring by aligning the spring hook end with the hole in the brake panel.
Apply a small amount of engine oil to the felt seal and install it to the brake panel.
Install the wear indicator plate on the brake cam by aligning the tooth on the plate with the groove on the brake cam.
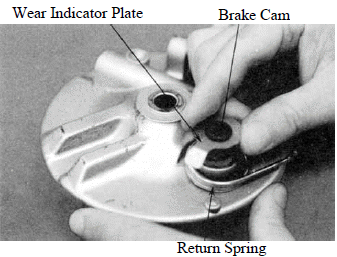
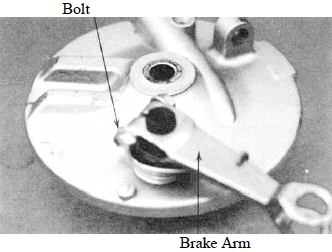
Install the brake arm on the brake cam by aligning the punch mark on the brake arm and the scribed line on the brake cam.
Install and tighten the brake arm bolt.
Torque:0.8~1.2kgf-m
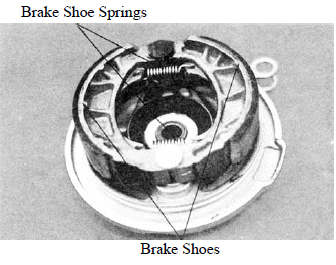
Install the brake shoe springs to the brake shoes and then install the brake shoes into the brake panel.
INSTALLATION
Install the brake panel onto the front wheel.
Install the front wheel.
Adjust the front brake lever free play.
HYDRAULIC BRAKE (FRONT BRAKE)
Brake Fluid Replacement/Air Bleeding Check the brake fluid level on level ground.
- When operating the brake lever, the brake reservoir cap must be tightened securely to avoid spill of brake fluid.
- When servicing the brake system, use shop towels to cover plastic parts and coated surfaces to avoid damage caused by spill of brake fluid.
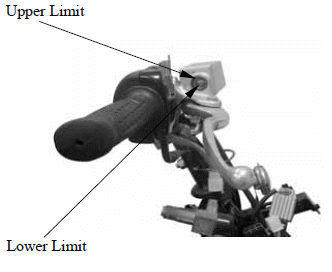
Brake Fluid Bleeding
In order to avoid spill of brake fluid, connect a transparent hose to the bleed valve.
Warning
Brake fluid spilled on brake pads or brake disk will reduce the braking effect. Clean the brake pads and brake disk with a high quality brake degreaser.
Fully apply the brake lever and then loosen the brake caliper bleed valve to drain the brake fluid until there is no air bubbles in the brake fluid. Then, tighten the bleed valve.
Repeat these steps until the brake system is free of air
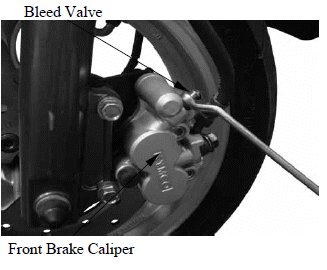
Brake Fluid Refilling
Add DOT-4 brake fluid to the brake reservoir.
- When bleeding, be careful not to allow air in the brake reservoir flowing into the brake system.
- When using a brake bleeder, follow the manufacturer's instructions.
- Never use dirty or unspecified brake fluid or mix different brake fluids because it will damage the brake system.
Make sure to bleed air from the brake system.
Brake Pad/Disk Replacement
The brake pads must be replaced as a set to ensure the balance of the brake disk.
Remove the two bolts attaching the brake caliper.
Remove the brake caliper.
Remove the brake pad pins to remove the brake pads.
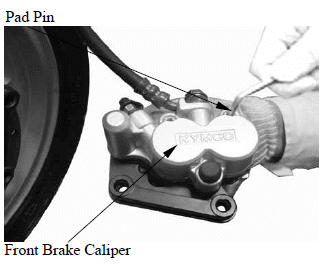
Install the brake pads in the reverse order of removal.
Tighten the brake pad pin bolts.
Torque: 1.5~2.0kgf-m
Keep grease or oil off the brake pads to avoid brake failure.
Do not reuse the brake pad pin bolts that have been removed.
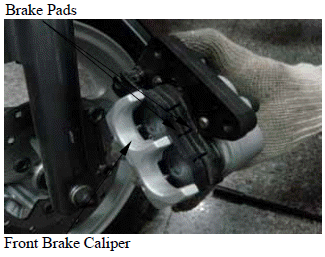
Brake Disk
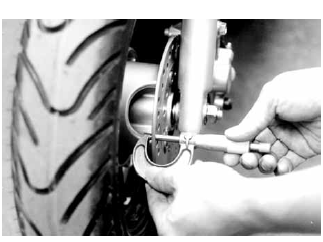
Measure the brake disk thickness.
Service Limit: 3.0mm
Measure the brake disk runout.
Service Limit: 0.3mm
See also:
 Kymco Agility 50 - Service manual > Front wheel
REMOVAL Jack the motorcycle front wheel off the ground. Remove the speedometer cable set screw and disconnect the speedometer cable. Remove the front brake cable.
 Kymco Agility 50 - Service manual > Brake master cylinder
Removal First drain the brake fluid from the hydraulic brake system. When servicing the brake system, use shop towels to cover rubber and plastic parts and coated surfaces to avoid being contaminated by brake fluid.
 BMW R 1250 RT
 Kymco Agility 50
 Piaggio Liberty 50
 Yamaha aerox NS50
 Aprilia SR50R
 Kymco Agility 50
 Vespa Primavera 50
 Peugeot Speedfight