 BMW R 1250 RT - Owner's Manual > Lighting
Replacing bulb for low-beam headlight
NOTICE The arrangements of the connectors and the light sources may differ from the following figures.
- Make sure the ground is level and firm and place the motorcycle on its stand.
- Switch off the ignition.
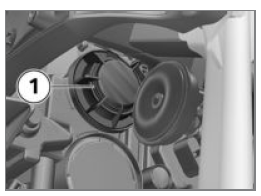
- Remove cover 1 by turning it counter-clockwise to replace the bulb for the low-beam headlight.
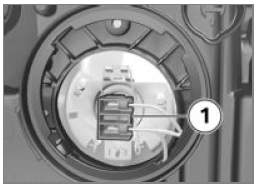
- Disconnect plug 1.
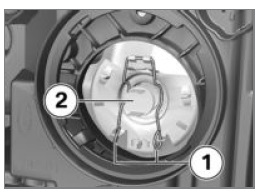
- Disengage spring clip 1 and swing it aside.
- Remove bulb 2.
- Replace the defective bulb.

- Hold the bulb by the base only, in order to keep the glass free of foreign matter.
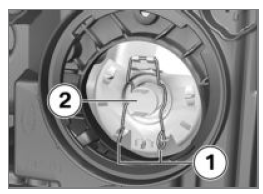
- Insert bulb 2, making sure that the tab is correctly positioned.
NOTICE The bulb might face in a direction other than that shown here.
- Engage spring clip 1 in the catch.
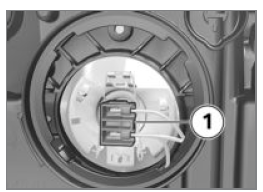
- Connect plug 1.
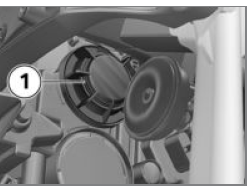
- Insert cover 1 and turn it clockwise to install.
Replacing bulb for high-beam headlight
NOTICE The description below steps you through the procedure for replacing the left bulb. The procedure for working on the right side is the same.
- Make sure the ground is level and firm and place the motorcycle on its stand.
- Switch off the ignition.
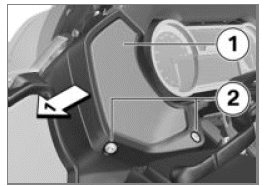
- Remove screws 2.
- Ease speaker cover 1 to the left to remove.
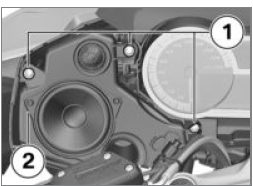
- Remove screws 1.
- Carefully remove speaker unit 2, noting the plug.
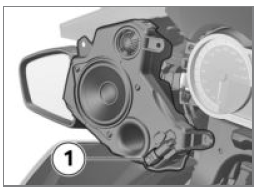
- Disconnect plug 1.
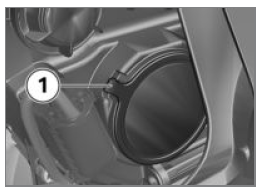
- Pull the tab to remove cover 1.
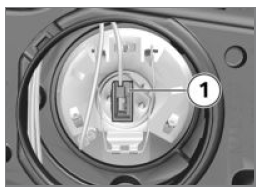
- Disconnect plug 1.
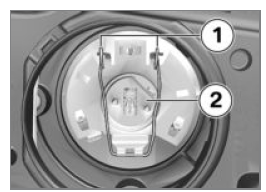
- Release spring clip 1 at left and right and swing it open.
- Remove bulb 2.
- Replace the defective bulb.

- Hold the bulb by the base only, in order to keep the glass free of foreign matter.
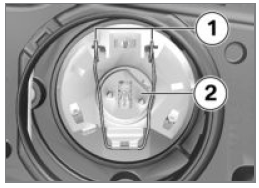
- Install bulb 2, making sure that the tab is correctly positioned.
NOTICE The bulb might face in a direction other than that shown here.
- Insert spring clip 1.
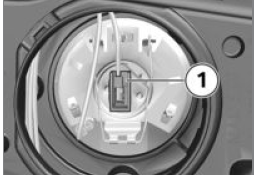
- Connect plug 1.
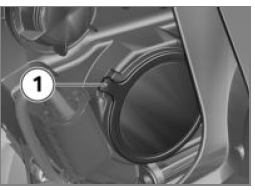
- Install cover 1.
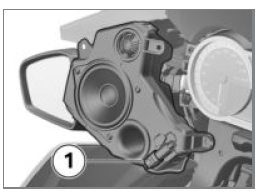
- Connect plug 1.
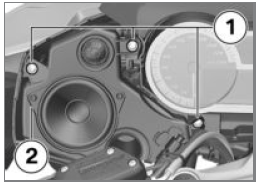
- Seat speaker unit 2 in the mount.
- Install screws 1.
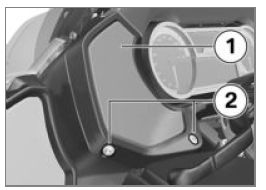
- Hold speaker cover 1 in position and install screws 2.
Replacing LED rear light
The LED rear light can be replaced only as a complete unit.
- Consult a specialist workshop, preferably an authorised BMW Motorrad dealer.
Replacing LED turn indicators
LED turn indicators can be replaced only as a complete unit. Consult a specialist workshop, preferably an authorised BMW Motorrad dealer.
Waveguide rings, replacing
- with daytime riding light OE
- with Headlight Pro OE
- Waveguide rings are integrated into the headlight and can be replaced only together with the headlight. Consult a specialist workshop, preferably an authorised BMW Motorrad dealer.
Replacing the LED additional headlights
- with additional headlight OE
The LED additional headlights can only be replaced in full; it is not possible to replace individual LEDs.
Consult a specialist workshop, preferably an authorised BMW Motorrad dealer.
Jump-starting
ATTENTION Excessive current flowing when the motorcycle is jump-started
Wiring smoulders/ignites or damage to the on-board electronics
- If the motorcycle has to be jump-started connect the leads to the battery terminals; never attempt to jump-start the engine by connecting leads to the on-board socket.
ATTENTION Contact between crocodile clips of jump leads and vehicle
Risk of short-circuit
- Use jump leads fitted with fully insulated crocodile clips at both ends.
ATTENTION Jump-starting with a voltage greater than 12 V
Damage to the on-board electronics
- Make sure that the battery of the donor vehicle has a voltage rating of 12 V.
- Place the motorcycle on its stand on firm, even ground.
- Removing battery cover.
- When jump-starting the engine, do not disconnect the battery from the on-board electrical system.
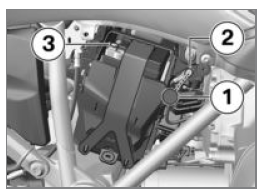
- Remove protective cap 1.
- Connect the red jump lead to the positive battery connection point 2 of the drained battery and the positive terminal of the donor battery.
- Then connect one end of the black jump lead to the negative terminal of the donor battery and the other end to negative terminal 3 of the discharged battery.
- Run the engine of the donor vehicle during jump-starting.
- Start the engine of the vehicle with the discharged battery in the usual way; if the engine does not start, wait a few minutes before repeating the attempt in order to protect the starter motor and the donor battery.
- Allow both engines to idle for a few minutes before disconnecting the jump leads.
- Disconnect the jump lead from the negative terminals first, then disconnect the second lead from the positive terminals.
NOTICE Do not use proprietary start-assist sprays or other products to start the engine.
- Install the protective cap.
- Installing the battery cover.
See also:
 BMW R 1250 RT - Owner's Manual > Silencer
Pivot silencer outwards CAUTION Hot exhaust system Risk of burn injury Do not touch a hot exhaust system. Place the motorcycle on its side stand on firm, level ground. Allow the silencer to cool. Remove front bolts 1 and washer 2. Remove the silencer cover 3. Detach bolt 1 from the clamp. Remove bolt 2 and lock washer 3. Turn silencer 4 clockwise and outwards.
 BMW R 1250 RT
 Kymco Agility 50
 Piaggio Liberty 50
 Yamaha aerox NS50
 Aprilia SR50R
 Kymco Agility 50
 Vespa Primavera 50
 Peugeot Speedfight