 Vespa Primavera 50 - Service manual > Chassis
N.B.
THE UNITS OF MEASUREMENT CONTAINED IN THIS CHAPTER ARE EXPRESSED IN TERMS OF THE DECIMAL METRIC SYSTEM. TO REFER TO THE UNIT OF MEASUREMENT EXPRESSED IN TERMS OF THE ANGLO-SAXON SYSTEM, SEE THE "CHARACTERISTICS" CHAPTER.
Seat
- Open the saddle.
- Remove the helmet compartment.
- Remove the four screws indicated.
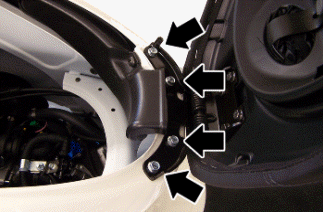
Rear rack
- Remove the screw and then the indicated cover.
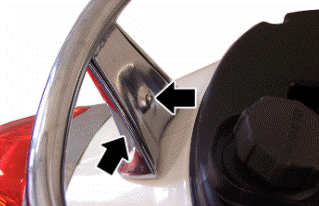
- Remove the two screws indicated.
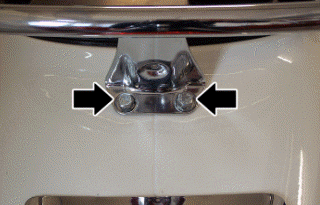
- Remove the helmet compartment.
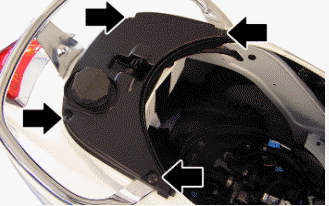
- Remove the four indicated screws, then undo the fuel tank cap to remove the plastic cover.
Rear handlebar cover
- Remove the upper handlebar cover.
- Working on both sides, undo the screw to remove the indicated plastic.
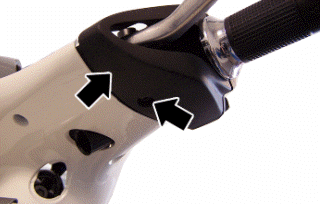
- On both sides, undo the two indicated screws to remove the control lock.
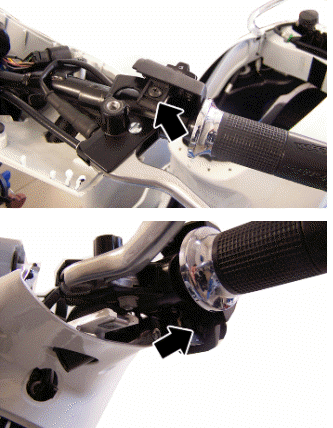
- Remove the handlebar.
- Remove the two screws indicated.
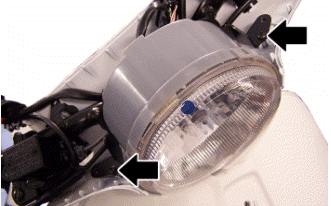
- Remove the indicated screw.
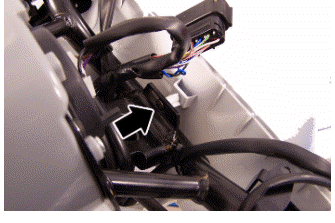
Instrument panel
- Remove the upper handlebar cover.
- Remove the four indicated screws fixing the instrument panel to the handlebar cover.
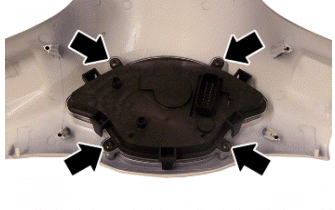
Front handlebar cover
- Remove the rear-view mirrors.
- Unscrew the indicated screw on both sides and the remove the headlight frame.
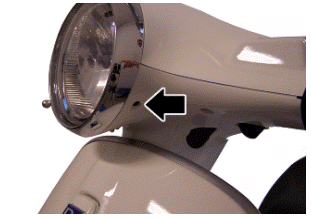
- Remove the indicated screw on both sides.
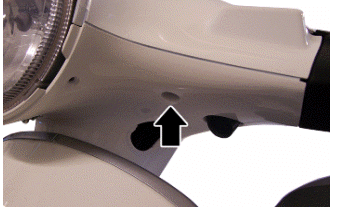
- Remove the two screws indicated.
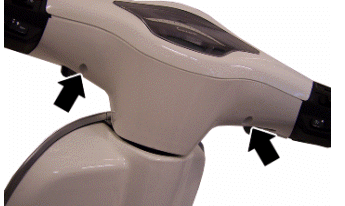
- Disconnect the indicated connector and remove the handlebar cover complete with instrument panel.
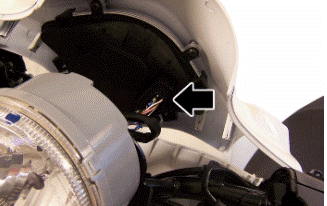
Headlight assy.
- Remove the upper handlebar cover.
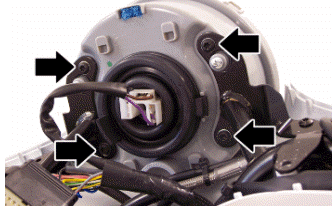
- Disconnect the connector of the light assembly and remove the four indicated screws.
ONLY IN THE VERSIONS WHERE FITTED
- Remove the indicated screw.
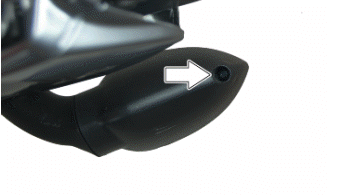
- Remove the bulb cover and take off the bulb.
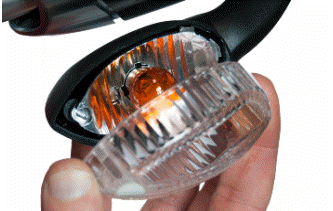
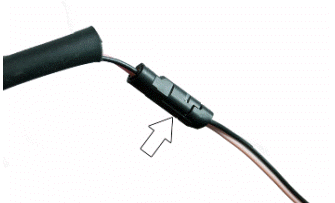
- Disconnect the connector.
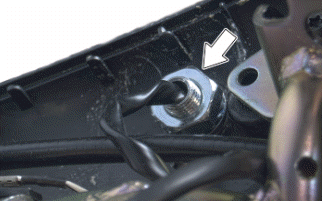
- Undo the indicated nut and remove the turn indicator from the rear handlebar cover.
Knee-guard
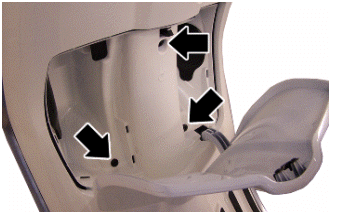
- Open the front case and remove the three indicated screws.
- On both sides remove the rubber cap of the turn indicator cover and the indicated underlying screw.
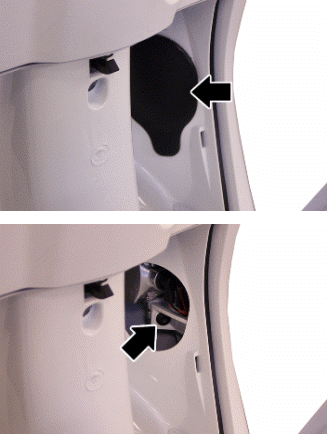
- By disengaging the fittings, remove the leg shield back plate towards the rear part of the vehicle.
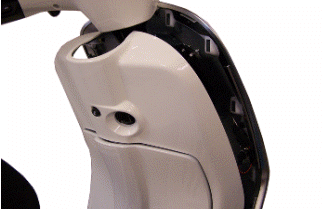
- Disconnect the saddle opening button connector and remove the fuse box from the front case.
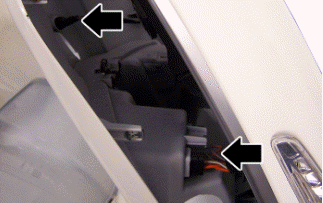
- Disconnect the saddle opening lever transmission and remove it from the leg shield back plate.
Taillight assy.
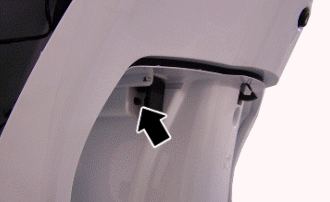
- Operating from the left side of the vehicle, undo the indicated toggle screw.
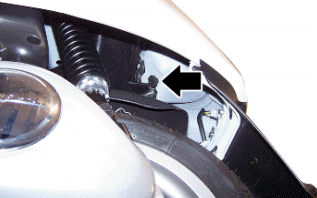
- Remove the light assembly by disengaging the fittings and disconnecting the two connectors.
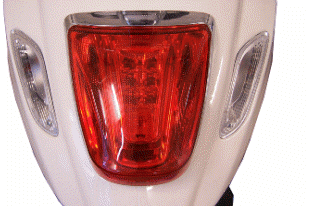
ONLY IN THE VERSIONS WHERE FITTED
- Remove the indicated screw.
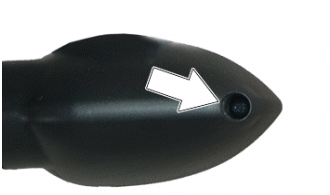
- Remove the bulb cover and take off the bulb.
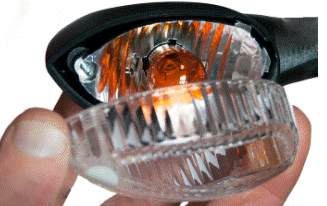
- Remove the indicated nut, disconnect the connector and remove the turn indicator from the license plate holder.
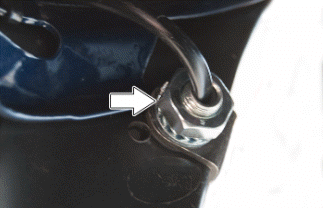
License plate light
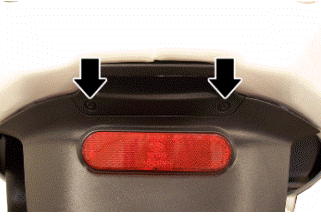
- Remove the licence plate light cover by unscrewing the two indicated screws and disconnect the bulb holder.
Footrest
- Remove the leg shield back plate.
- Remove the spark plug inspection lid.
- Remove the two screws indicated.
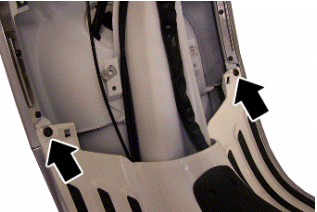
- On both sides of the vehicle unscrew the indicated screw, then remove the plastic and the underlying screw.
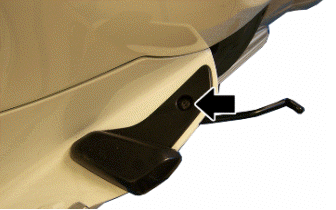
- Working on both sides, by disengaging the fittings remove the outermost rubber cover and then the underlying screw.
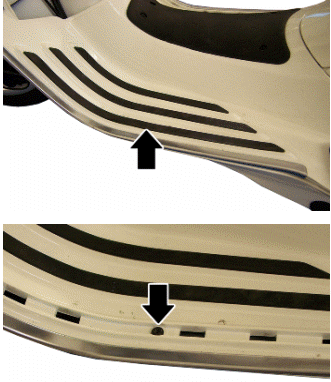
- Undo the six indicated screws on both sides and remove the front shield frame.
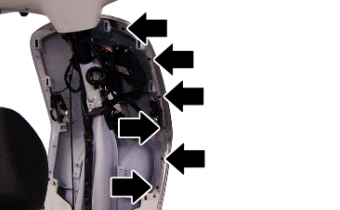
- By disengaging the fittings, remove the footrest by extracting it upwards.
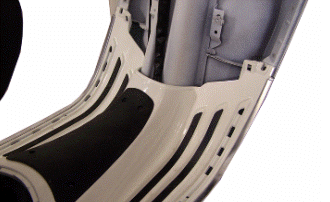
- Remove the indicated plastic on both sides.
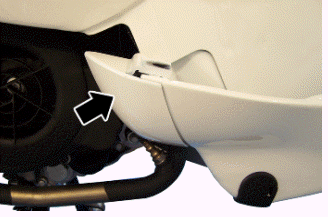
License plate holder
- Remove the indicated screw on both sides of the license plate holder.
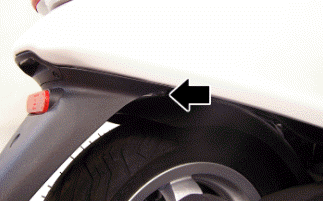
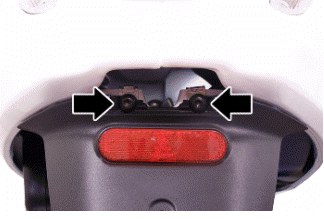
- Remove the licence plate light cover by unscrewing the two indicated screws and disconnect the bulb holder.
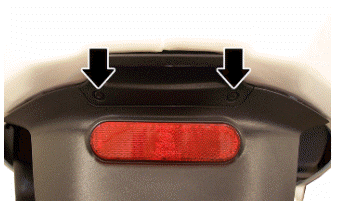
- Remove the two screws indicated.
Air filter
- Remove the helmet compartment.
- Disconnect the air socket duct.
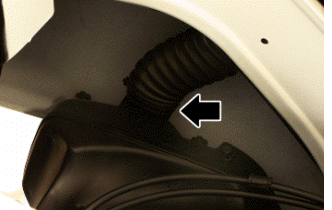
- Remove the two indicated fixing screws at the crankcase.
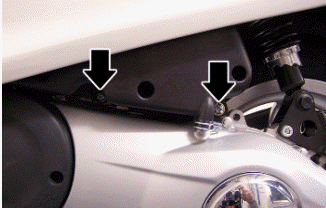
- Remove the three indicated clamps.
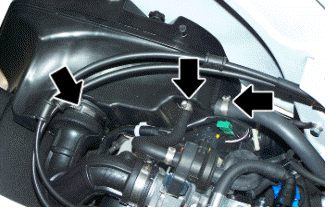
Rear mudguard
- Remove the rear wheel.
- Undo the screw indicated.
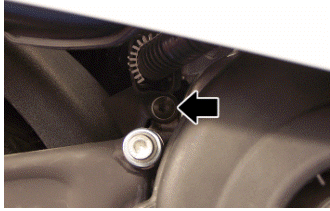
- Remove the two screws indicated.
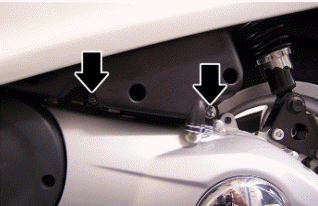
Fuel tank
- Remove the helmet compartment.
- Remove the four indicated screws, then undo the fuel tank cap to remove the plastic cover.
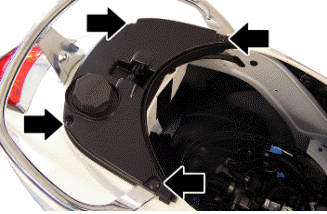
- Remove the rear wheel.
- Remove the rear light unit and undo the indicated underlying screw.
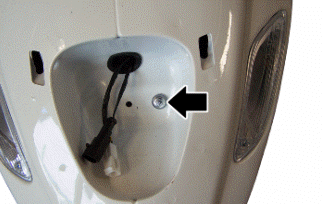
- Remove the fuel piping fixing screw indicated.
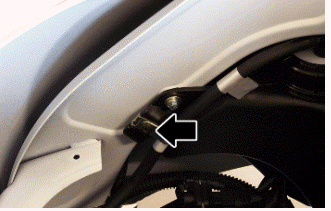
- Remove the indicated screw.
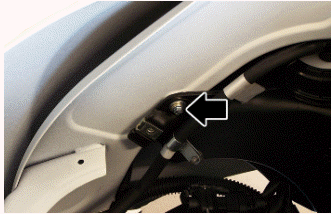
- Remove the clamp and slide off the indicated piping.
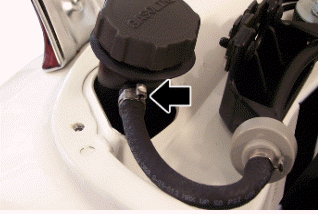
- Remove the indicated screw.
- Slide off from the bottom the tank, by disconnecting the pump and fuel level transmitter connectors and the delivery piping.
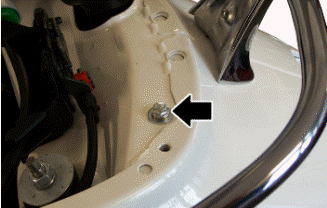
Front mudguard
- First remove the steering tube and uncouple the front brake pipes from the calliper in order to remove the front mudguard
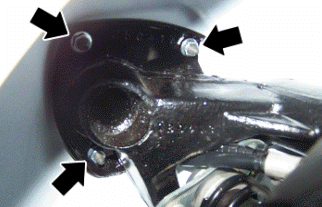
- Remove the three mudguard-steering tube clamps indicated in the figure
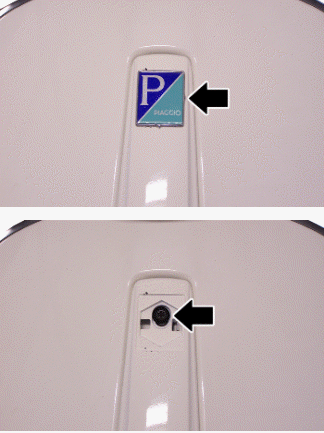
Front central cover
- Remove the "PIAGGIO" clip-on badge
- Unscrew the screw indicated in the figure
- Remove the grille
Pre-delivery
Aesthetic inspection
Appearance check:
- Paintwork
- Fitting of Plastic Parts
- Scratches
- Dirt
Tightening torques inspection
Locking Check
- Safety fasteners
- Fixing screws
Safety fasteners:
- Rear shock absorber upper retainer
- Rear shock absorber lower clamping
- Front wheel axle nut
- Front wheel screws
- Wheel hub nut
- Front brake calliper fixing screws
- Swinging arm - chassis pin
- Engine-swinging arm pin
- Engine arm pin - Chassis arm
- Handlebar lock nut
- Lower steering ring nut
- Upper steering ring nut
Electrical system
Electrical system:
- Battery
- Main switch
- Headlamps: high beam lights, low beam lights, tail lights and their warning lights
- Headlight adjustment according to regulations in force
- Rear light, brake light and license plate light
- Front and rear stop light switches
- Turn indicators and their warning lights
- Instrument panel lights
- Instrument panel: fuel gauge
- Instrument panel warning lights
- Horn
- Starter
CAUTION
TO ENSURE MAXIMUM PERFORMANCE, THE BATTERY MUST BE CHARGED BEFORE USE.
INADEQUATE CHARGING OF THE BATTERY WITH A LOW LEVEL OF ELECTROLYTE BEFORE IT IS FIRST USED SHORTENS BATTERY LIFE.
WARNING
KEEP SPARKS AND NAKED FLAMES AWAY FROM THE BATTERY WHILE RECHARGING. REMOVE THE BATTERY FROM THE VEHICLE, DISCONNECTING THE NEGATIVE TERMINAL FIRST.
CAUTION
WHEN INSTALLING THE BATTERY, ATTACH THE POSITIVE LEAD FIRST AND THEN THE NEGATIVE ONE.
WARNING
THE BATTERY ELECTROLYTE IS POISONOUS AS IT MAY CAUSE SERIOUS BURNS. IT CONTAINS SULPHURIC ACID. AVOID CONTACT WITH YOUR EYES, SKIN AND CLOTHING.
IF IT ACCIDENTALLY COMES INTO CONTACT WITH YOUR EYES OR SKIN, WASH WITH ABUNDANT WATER FOR APPROX. 15 MIN. AND SEEK IMMEDIATE MEDICAL ATTENTION.
IF ACCIDENTALLY SWALLOWED, IMMEDIATELY DRINK LARGE QUANTITIES OF WATER OR VEGETABLE OIL. SEEK IMMEDIATE MEDICAL ATTENTION.
BATTERIES PRODUCE EXPLOSIVE GASES; KEEP CLEAR OF NAKED FLAMES. VENTILATE THE AREA WHEN RECHARGING INDOORS. ALWAYS WEAR EYE PROTECTION WHEN WORKING IN THE PROXIMITY OF BATTERIES.
KEEP OUT OF THE REACH OF CHILDREN
CAUTION
NEVER USE FUSES WITH A CAPACITY HIGHER THAN THAT RECOMMENDED. USING A FUSE OF UNSUITABLE RATING MAY SERIOUSLY DAMAGE THE VEHICLE OR EVEN CAUSE A FIRE.
Levels check
Level check:
- Hydraulic braking system fluid level.
- Rear hub oil level.
- Engine oil level
Road test
Test ride:
- Cold start
- Instrument panel operation
- Response to throttle control
- Stability when accelerating and braking
- Front and rear brake efficiency
- Front and rear suspension efficiency
- Abnormal noise
Static test
Static check after test drive:
- Restarting when warmed up
- Minimum holding (turning the handlebar)
- Uniform turning of the steering
- Possible leaks
CAUTION
CHECK AND ADJUST TYRE PRESSURE WITH TYRES AT AMBIENT TEMPERATURE.
CAUTION
NEVER EXCEED THE RECOMMENDED INFLATION PRESSURES AS TYRES MAY BURST.
Functional inspection
Functional Checks:
Braking system (hydraulic)
- Lever travel
Braking system (mechanical)
- Lever travel
Clutch
- Proper functioning check
Engine
- Proper general functioning and no abnormal noise check
Others
- Check documentation
- Chassis and engine numbers check
- Tool kit
- License plate fitting
- Locks checking
- Tyre pressure check
- Installation of mirrors and any possible accessories
See also:
 Vespa Primavera 50 - Service manual > Braking system
N.B. THE UNITS OF MEASUREMENT CONTAINED IN THIS CHAPTER ARE EXPRESSED IN TERMS OF THE DECIMAL METRIC SYSTEM. TO REFER TO THE UNIT OF MEASUREMENT EXPRESSED IN TERMS OF THE ANGLO-SAXON SYSTEM, SEE THE "CHARACTERISTICS" CHAPTER.
 BMW R 1250 RT
 Kymco Agility 50
 Piaggio Liberty 50
 Yamaha aerox NS50
 Aprilia SR50R
 Kymco Agility 50
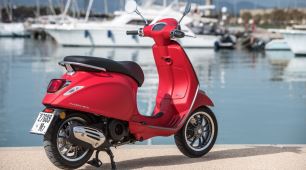 Vespa Primavera 50
 Peugeot Speedfight