 Aprilia SR50R - Service manual > Front Fork
FRONT FORK DIAGRAM
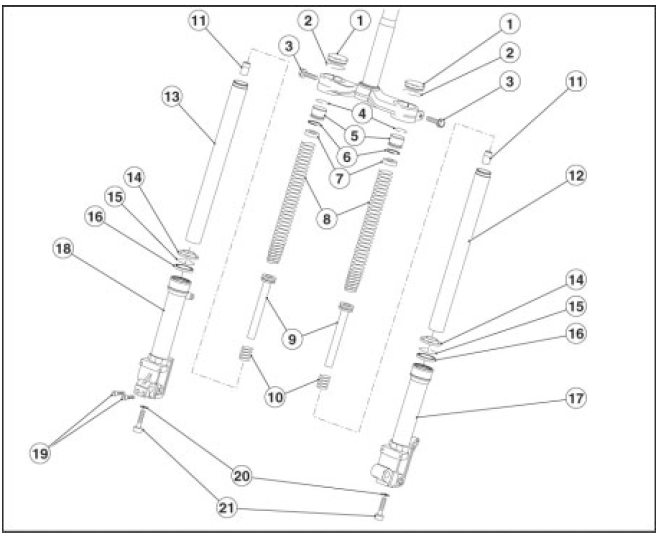
Key:
- Rubber cap
- Snap ring
- Fork clamp bolts
- Snap ring
- Sealing cap
- O-ring
- Rubber seal
- Spring
- Damping cylinder
- Counter spring
- Buffer
- Left slider
- Right slider
- Dust seal
- Snap ring
- Seal
- Left stanchion tube
- Right stanchion tube
- Securing screws
- Sealing washer
- Capscrew
REMOVING THE FORK LEG
- Remove the headlight, see (REMOVING THE HEADLIGHT).
- Remove the front wheel, see (REMOVING THE FRONT WHEEL).
- Remove the front mudguard, see (REMOVING THE FRONT MUDGUARD).
- Loosen and remove the two inner screws.
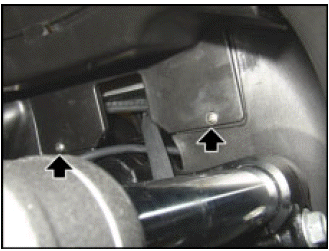
- Release the wheelhouse cover and slide it out of the fork.
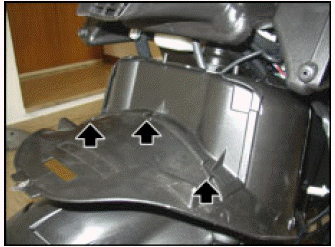
- Completely turn the handlebar to the side of the fork leg to be removed.
- Loosen the plate clamp screw.
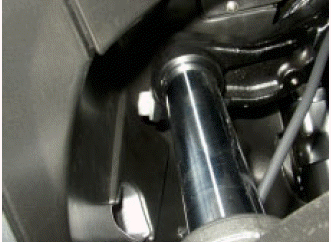
- Slide out and raise the fork leg as much as necessary to be able to remove the snap ring.
- Move down the fork leg with the wheel holder and remove it completely.
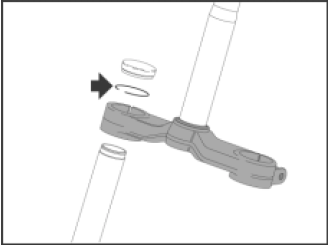
DISASSEMBLING THE STANCHION
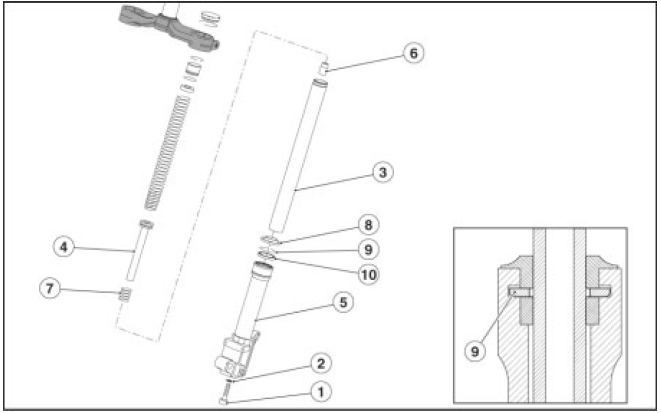
- Remove the stanchion assembly, see (REMOVING THE FORK LEG).
CAUTION Prepare a graduated receptacle with a capacity of at least 300 cm3 (18.31 in3.).
- Let the fork leg enter the stanchion completely, turn the stanchion assembly and let the fluid drain in the container.
WARNING Check the oil level. If lower than 103 cm3 (6.28 in3), top up or change.
- Loosen and remove the screw (1) (bottom end) and collect the copper washer (2).
- Slide out the slider (3) with damper (4).
- Turn the stanchion (5), collect the buffer (6) and the counter spring (7).
- Remove the dust seal (8).
- Remove the circlip (9).
WARNING While reassembling, fit the circlip (9) with the sharp edge fully home (see figure).
- Remove the seal (10).
Rear Suspension
REMOVING THE SHOCK ABSORBER
- Position the vehicle on the center stand.
WARNING Fit a suitable shim in-between the frame and the rear wheel to avoid the air box sinking and pushing on the inspection cover.
- Loosen and remove the top screw.
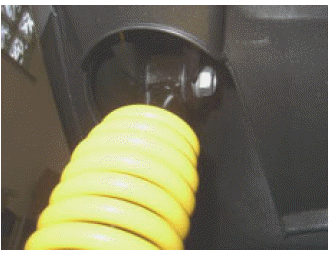
- Loosen and remove the nut and remove the screw.
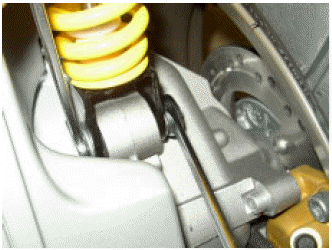
- Remove the rear shock absorber.
COOLING SYSTEM
DIAGRAM
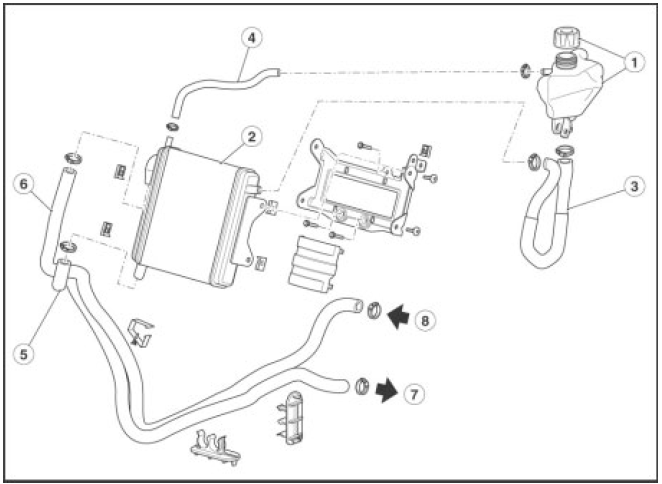
Key:
- Expansion reservoir with plug;
- Radiator;
- Expansion reservoir-radiator hose;
- Breather hose;
- Radiator-pump hose;
- Head-radiator hose;
- To water pump;
- From head.
EMPTYING THE COOLING SYSTEM
CAUTION Before proceeding with emptying the cooling system, it is necessary to take a receptacle with a suitable capacity.
- Remove the front cover, see (REMOVING THE FRONT COVER).
- Unscrew and remove the expansion reservoir plug.
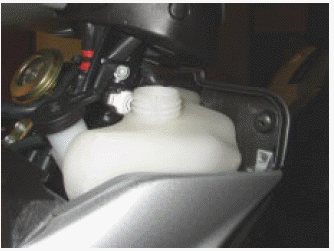
- Remove the lower shield, see (REMOVING THE LOWER SHIELD).
- Disconnect the generator connector.
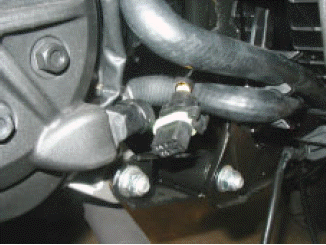
- Place the container under the coolant pump.
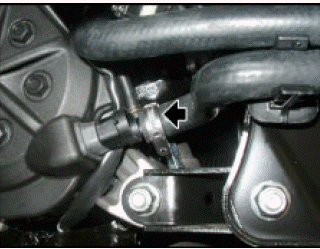
- Loosen the clamp and remove the radiator-pump hose, let the coolant flow in the container.
CAUTION Once the system is filled, bleed air, see (COOLANT).
See also:
 Aprilia SR50R - Service manual > Braking System
CHANGING THE BRAKE PADS Position the vehicle on the center stand. Remove the brake caliper from the disc, but leave the line connected.
 Aprilia SR50R - Service manual > Electrical System
Checking the Electrical Components CHECKING THE COMPONENTS IE361
 BMW R 1250 RT
 Kymco Agility 50
 Piaggio Liberty 50
 Yamaha aerox NS50
 Aprilia SR50R
 Kymco Agility 50
 Vespa Primavera 50
 Peugeot Speedfight