 Kymco Agility 50 - Service manual > Headlight
REMOVAL
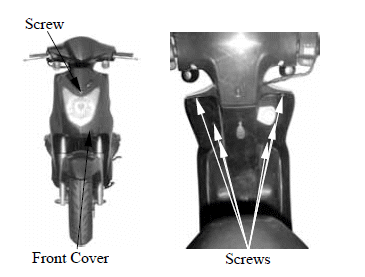
Remove the screw on the front of the front cover.
Remove the six screws on the back of the front cover.
Remove the front cover.
The installation sequence is the reverse of removal.
- Align the tab on the headlight with the groove on the handlebar cover.
- After installation, adjust the headlight beam.
BULB REPLACEMENT
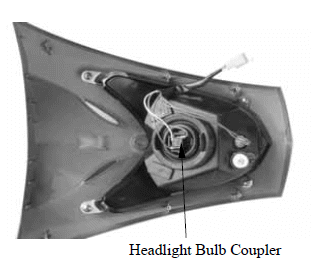
Remove the headlight bulb Coupler. Remove the headlight replace with new bulbs.
The installation sequence is the reverse of removal.
TAILLIGHT/STOPLIGHT/REAR TURN SIGNAL LIGHT/LICENSE LIGHT
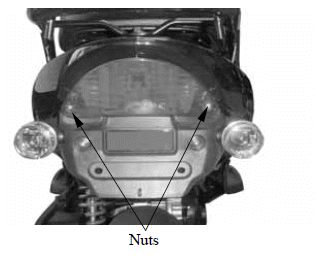
Remove the two screws attaching the rear protector molding.
Remove the rear protector molding and remove the two nuts attaching the rear light shell.
Remove the rear turn signal light bulb and replace with a new one.
The installation sequence is the reverse of removal.
Evaporative/Exhaust Emission Control System
EXHAUST EMISSION CONTROL SYSTEM DIAGRAM
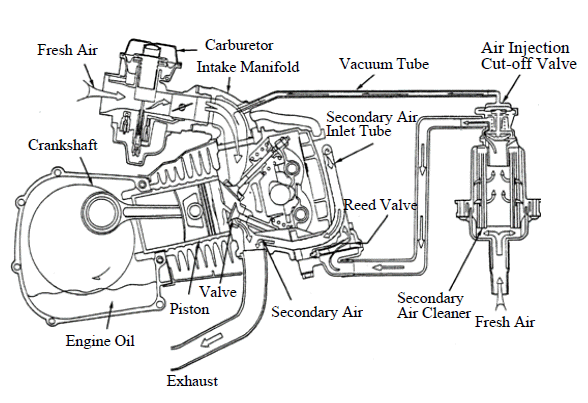
- Fresh Air
- Crankshaft
- Carburetor
- Intake Manifold
- Vacuum Tube
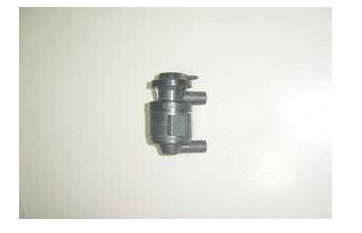
- Air Injection Cut-off Valve
- Fresh Air
- Secondary Air Cleaner
- Secondary Air
- Exhaust
- Valve
- Piston
- Engine Oil
EXHAUST EMISSION CONTROL SYSTEM
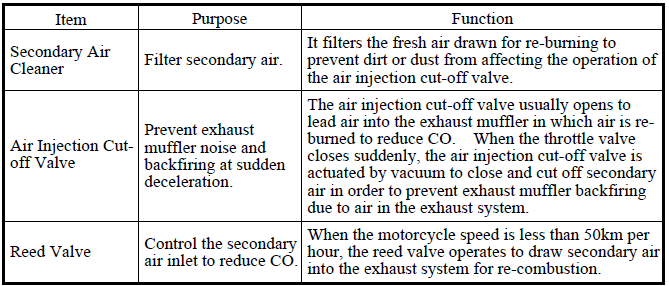
The exhaust emission control system adopted in this model utilizes the reed valve to draw secondary air into the exhaust system for re-combustion by means of exhaust pulsation so as to minimize the exhaust emission.
FUNCTION
SERVICE INFORMATION
GENERAL INSTRUCTIONS
- During operation, be careful to avoid scalding caused by the exhaust muffler.
- Note the locations of tubes for proper installation.
- Replace any damaged tube with a new one.
- Make sure to tighten the connector of each tube securely
TOOLS
- Vacuum pump
SPECIFICATIONS
Air injection cut-off valve actuating pressure
250mm/Hg 30 liter/min.
Reed valve stopper clearance 6.6mm
TROUBLESHOOTING
High CO at idle speed
- Damaged or clogged reed valve
- Damaged or clogged air injection cut-off valve
- Clogged air cleaner
Backfiring at sudden deceleration
- Damaged reed valve (malfunction)
- Faulty air injection cut-off valve (unable to close)
- Carburetor incorrectly adjusted
- Faulty air cut-off valve
- Leaking vacuum tube
Exhaust muffler noise
- Faulty air injection cut-off valve
- Broken vacuum tube
- Faulty reed valve
MAINTENANCE SCHEDULE
(1) PERIODIC MAINTENANCE:
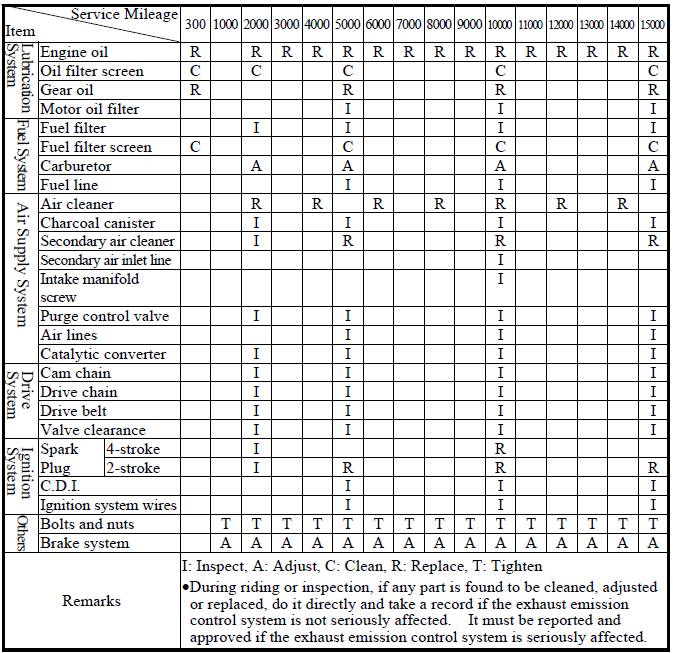
(2) IRREGULAR MAINTENANCE:

SECONDARY AIR CLEANER
REMOVAL
Remove the met-in box. Remove the center cover. Remove the rear seat and rear carrier. Remove the frame body covers. Remove the floor board.
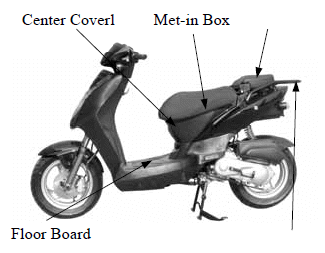
- Center Coverl
- Met-in Box
- Floor Board
Disconnect the secondary air cleaner connecting tube.
Remove the air cleaner attaching the air cleaner.
INSTALLATION
The installation sequence is the reverse of removal.
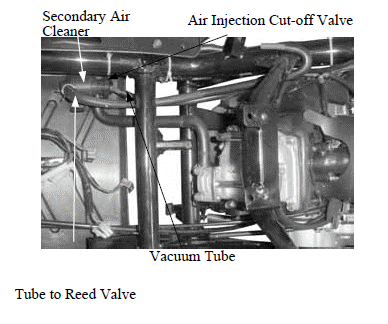
DISASSEMBLY
Remove the two
The secondary air cleaner must be assembled and installed properly to avoid dust entering the air cleaner.
See also:
 Kymco Agility 50 - Service manual > Handlebar switches
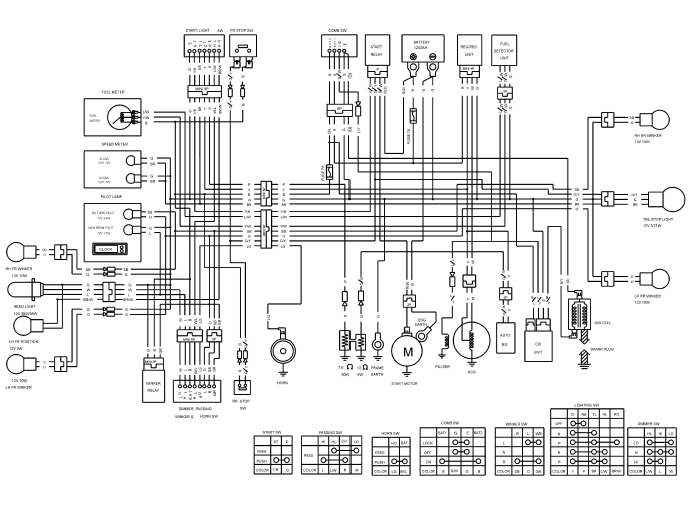
INSPECTION Remove the handlebar front cover. Disconnect the handlebar switch couplers and check for continuity between wire terminals. If there is any abnormality found, check each switch.
 BMW R 1250 RT
 Kymco Agility 50
 Piaggio Liberty 50
 Yamaha aerox NS50
 Aprilia SR50R
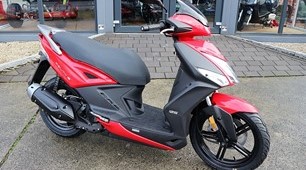 Kymco Agility 50
 Vespa Primavera 50
 Peugeot Speedfight