 Aprilia SR50R - Service manual > Scheduled Maintenance
BRAKE SYSTEM
WARNING In case of excessive stroke of the brake lever, excessive elasticity or air bubbles, bleed the air out of the circuit.
Do not use or mix different types of silicone or oil fluids.
Prevent water or dust from accidentally getting into the circuit.
CAUTION The following procedure refers to both brake systems.
Check
CAUTION Place the vehicle on a firm and level surface.
- Position the vehicle on the center stand.
- Make sure that the fluid in the reservoir is above the "MIN" level mark.
If the fluid does not reach at least the "MIN" mark, proceed as follows:
WARNING The brake fluid level decreases as the brake pads wear down.
- Check brake pads for wear.
- If the pads and/or the disc do not need replacing, top up.
TOPPING UP
WARNING Danger: brake fluid could leak out. Do not operate the front brake lever if the screws are loose or, most important, if the brake fluid reservoir cover has been removed. Place a cloth under the brake fluid reservoir.
- Loosen and remove the two screws.
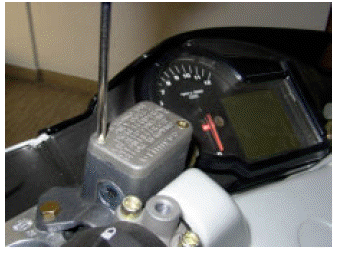
WARNING Avoid prolonged exposure of brake fluid to air.
Brake fluid is hygroscopic and will absorb moisture from the air. Keep the brake fluid reservoir open JUST LONG ENOUGH to top up the level.
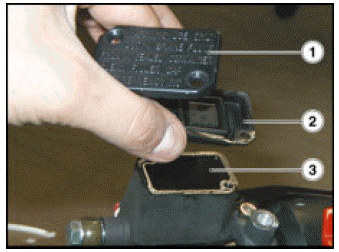
- Raise and remove the cover (1).
- Remove the gasket (2).
CAUTION In order not to spill the brake fluid while topping up, do not shake the vehicle.
- Top up the tank (3) with brake fluid to the correct level.
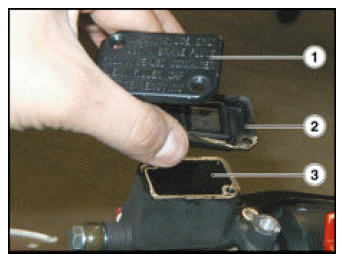
WARNING Never top up to the maximum level, just top up until the level is above the MIN mark. It is advisable to top up until reaching the "MAX" level only with new pads. The brake fluid level decreases as the brake pads wear down. Do not reach the "MAX" level with worn out pads, since this will cause a fluid outflow when the pads are changed.
- To refit components, follow the disassembly procedure in reverse order.
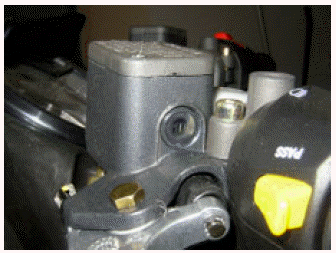
CHANGING THE BRAKE FLUID
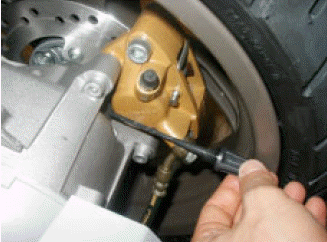
- Remove the bleed valve rubber cap.
- Insert one end of a transparent plastic tubing inside the caliper bleed valve and the other end in a receptacle for collection.
- Loosen the bleed valve by about one turn.
CAUTION While carrying out this operation, ensure that some fluid is always present inside the reservoir. If this is not the case, once the operation is over, the air must be bled out.
- Check that the fluid is flowing off the tank and, before emptying, tighten the bleed valve.
- Top up.
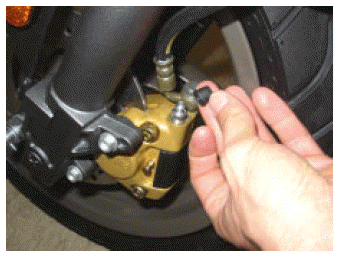
- Loosen the bleed valve again by about half a turn.
- Check that the fluid comes out of the plastic tubing and, as soon as the fluid color changes (from a darker to a lighter color) tighten the bleed valve and remove the tubing.
- Refit the rubber cap.
- Top up fluid inside the reservoir.
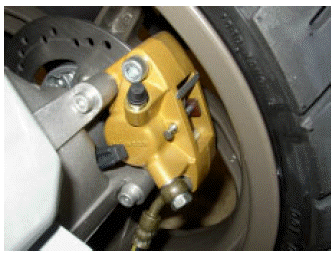
CHECKING BRAKE PAD WEAR
CAUTION The following instructions apply to both brakes.
Outlined below is a quick brake pad inspection procedure:
- Position the vehicle on the center stand.
- Using a lamp and a mirror placed between the brake caliper and pads, visually check as follows.
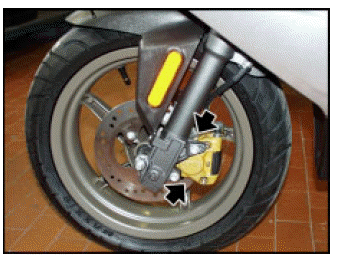
FRONT BRAKE CALIPER
- From below, on the front part, for the left pad;
- From above, on the front part, for the right pad; look through the rim.
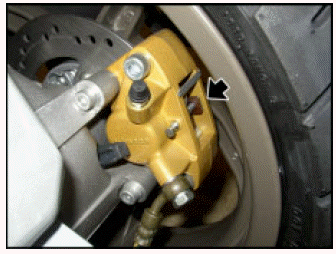
REAR BRAKE CALIPER
- From above, on the rear part, for both pads.
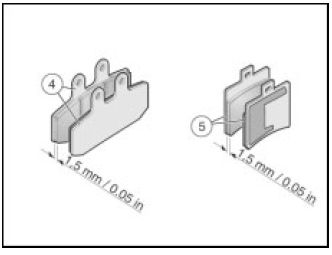
If the thickness of the friction material (even of a single pad) has reduced to about 1.5 mm (0.05 in), have both pads changed.
- Front brake pads (4).
- Rear brake pads (5).
BLEEDING THE BRAKING SYSTEM
Any air present inside the hydraulic circuit will serve as a "pad" by absorbing most of the pressure coming from the brake master cylinder, thus reducing caliper efficiency during braking. If air is present inside the circuit, the brake control is "spongy" and braking efficiency is reduced.
DANGER It is essential to bleed air out of the hydraulic circuit after the brakes have been refitted and the braking system has been restored to standard operating conditions, as it would be very dangerous for the vehicle and the rider not to do so.
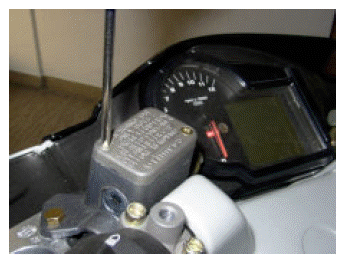
- Loosen the two brake fluid reservoir screws.
- Raise and remove the cover (1).
CAUTION It is recommended to keep the fluid even with the edge of the reservoir (horizontal) in order not to spill fluid when topping up.
- Remove the gasket (2).
- Top up fluid, if necessary.
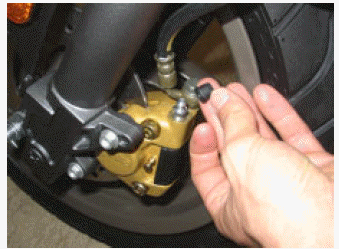
- Remove the bleed valve rubber cap.
- Connect a clear tube section to the bleed valve.
WARNING Do not soil brake pads or discs with brake fluid.
- Put the free end of the hose into a receptacle.
- Slowly pull the brake lever completely two or three times, then keep it pulled.
- Loosen the bleed valve, press the lever and check if air bubbles are coming out of the tube together with the fluid.
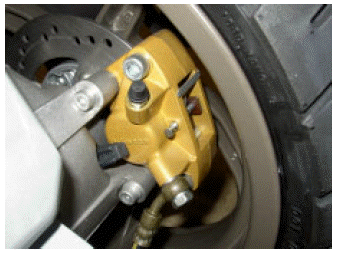
WARNING Tighten the bleed valve before releasing the lever in order to prevent air from getting into the brake circuit.
- When air is no longer coming out, tighten the bleed valve and release the brake lever.
CAUTION Repeat the last three steps until the air bubbles have been completely eliminated.
WARNING After reassembly, repeatedly pull the brake lever and check the braking system for correct operation.
CLEANING THE AIR FILTER
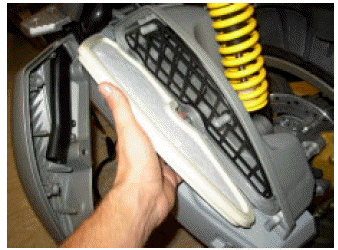
- Remove the air filter, see (REMOVING THE AIR FILTER).
- Wash the filtering element with clean, non-flammable solvents or solvents with a high volatility point, then let it dry thoroughly.
- Apply a filter oil on the entire surface of the filtering element.
WARNING The partial cleaning of the filter does not exclude or postpone the replacement of the filter itself.
Do not start the engine when the air filter is not in place.
Do not clean the filtering element with gasoline or solvents, since they may cause a fire in the fuel supply system, with serious danger for persons in the vicinity and for the vehicle.
Do not use filters that have already been used.
- Change the air filter with a new one of the same type.
COOLANT
CHECKING AND TOPPING UP THE COOLANT LEVEL
WARNING Wait for the engine to cool down before checking or topping up the coolant level.
- Stop the engine and wait until it has cooled down.
CAUTION Place the vehicle on a firm and level surface.
- Remove the front cover, see (REMOVING THE FRONT COVER).
- Make sure that the level of the fluid contained in the expansion reservoir is included between the "MIN" and "MAX" marks.
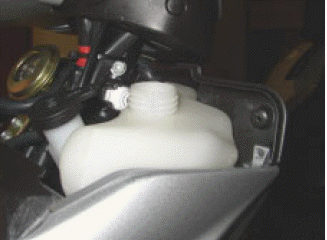
MIN = minimum level.
MAX = maximum level.
If not so:
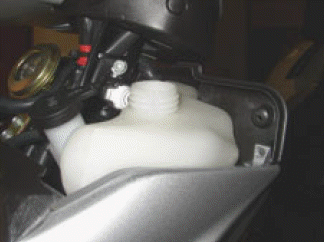
- Unscrew the filler plug (by turning it counterclockwise two turns), without removing it.
- Wait a few seconds in order to release any residual pressure.
- Unscrew and remove the plug.
WARNING Do not put additives or other substances into the fluid.
- Top up the expansion reservoir by adding coolant, see (LUBRICANT CHART), until it almost reaches the "MAX" level.
- Do not exceed this level, otherwise the fluid will flow out while the engine is running.
- Refit the filler plug.
WARNING In case of excessive consumption of coolant and in case the expansion reservoir remains empty, make sure that there are no leaks in the circuit.
BLEEDING THE COOLING SYSTEM
CAUTION If the coolant in the expansion reservoir is used up or if the circuit is emptied, it is necessary to bleed it.
Proceed as follows:
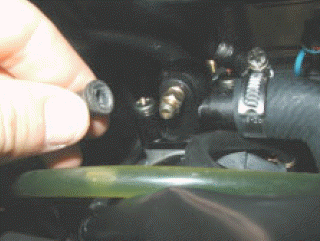
- Remove the rubber gaiter on the bleed valve located on the head.
- Fit a small tube in the bleed valve and leave the other end in a suitable receptacle.
- Unscrew the bleed valve.
- Fill the expansion reservoir with coolant.
- Bleed the air, tighten the valve and continue adding fluid until reaching maximum level.
- Start the vehicle and let it warm up.
- Bleed again and top up.
GEAR FLUID IE361 C364
CAUTION Use only recommended oil, see (LUBRICANT CHART).
- Ride several kilometers (miles) to warm up the engine to operating temperature and then stop the engine.
Check
- Position the vehicle on firm and level ground.
- Position the vehicle on the center stand.
WARNING Allow several minutes for the engine and exhaust system to cool down.
- Unscrew and extract the plug/dipstick.
- Clean the part in contact with the oil with a clean cloth.
- Tighten the plug/dipstick fully into the filler opening.
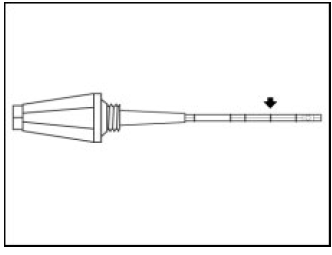
- Extract the plug/dipstick again and check the oil level on the dipstick.
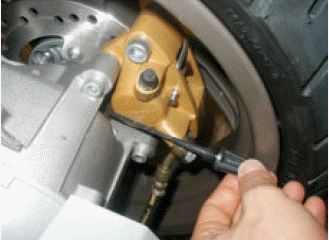
- The correct level is achieved when the oil reaches approximately the second mark over the dot.
- If necessary, top up.
TOPPING UP
- Pour a small quantity of oil into the filler opening. Allow one minute for the oil to flow into the crankcase.
- Check the oil level and top up if necessary.
- Top up by adding small quantities of oil, until reaching the prescribed level.
- When finished, tighten the plug/dipstick.
CAUTION Do not use the vehicle when lubricant levels are low or the lubricant has become contaminated. Use specified lubricants only. Improper lubrication will lead to moving part fretting, resulting in irreparable damage.
CHANGE
- Position the vehicle on firm and level ground.
- Position the vehicle on the center stand.
WARNING Allow several minutes for the engine and exhaust system to cool down.
- Stop the engine and let it cool down, in order to allow the oil to flow into the crankcase and cool down.
- Unscrew and extract the plug/dipstick.
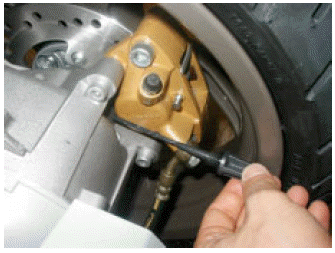
- Take a receptacle of suitable capacity and set it under the drain screw.
- Release and remove the drain screw.
- Let fluid fully drain inside the container.
WARNING Used oil contains substances that are very dangerous for the environment. Dispose of used oil in accordance with applicable regulations.
- Fit and tighten the drain screw.
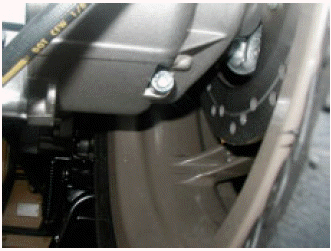
- Pour oil through the transmission oil filler hole.
- Screw and tighten the plug/dipstick.
- Start the engine and let it run for a few minutes. Stop the engine and let it cool down.
- Check the gear fluid level.
GEAR FLUID IE50
CAUTION Use only recommended oil, see (LUBRICANT CHART).
CHECK
- Ride several miles to warm up the engine to operating temperature and then stop the engine.
- Position the vehicle on firm and level ground.
- Position the vehicle on the center stand.
WARNING Allow several minutes for the engine and exhaust system to cool down.
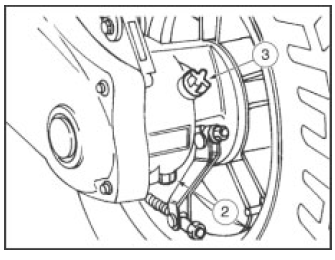
- Place a graduated receptacle (1) with at least 150 cm3 capacity (9.15 in3) under the drain plug (2).
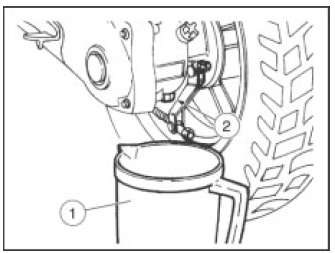
- Unscrew and remove the filler plug (3) and oil drain plug (2).
- Let the oil fully drain off the crankcase.
- Measure the quantity: if it is less than 130 cm3 (7.93 in3), restore the correct level by topping up, see (LUBRICANT CHART).
- Tighten the drain plug (2).
- Refill with the oil recovered in the graduated receptacle (1).
- Tighten the filler plug (3).
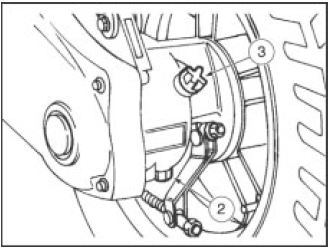
WARNING Firmly tighten the filler and drain plugs and ensure there are no oil leaks.
Periodically check that there are no leaks at the crankcase cover gasket.
Do not use the vehicle with insufficient lubrication or with contaminated or unsuitable lubricants, since this would cause early wear of moving parts and may also cause irreparable damage.
CHANGE
- Ride several miles to warm up the engine to operating temperature and then stop the engine.
- Position the vehicle on the center stand.
- Place a graduated receptacle (1) with at least 150 cm3 capacity (9.15 in3), under the drain plug (2).
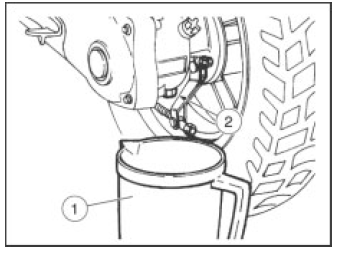
- Unscrew and remove the filler plug (3) and oil drain plug (2).
- Let the oil fully drain off the crankcase.
- Tighten the drain plug (2) and pour through the filler 130 cm3 (7.93 in3) of oil, see (LUBRICANT CHART).
- Tighten the filler plug (3).
WARNING Firmly tighten the filler and drain plugs and ensure there are no oil leaks.
Periodically check that there are no leaks at the crankcase cover gasket.
Do not use the vehicle with insufficient lubrication or with contaminated or unsuitable lubricants, since this would cause early wear of moving parts and may also cause irreparable damage.
MIXER OIL IE361 C364
TOPPING UP
CAUTION The vehicle fits a separate mixer that mixes fuel and oil, necessary for lubrication.
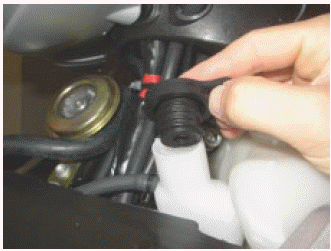
- Remove the front cover, see (REMOVING THE FRONT COVER).
- Remove the plug.
- Fill with oil, see (LUBRICANT CHART).
- Refit the plug.
AIR BLEED
WARNING If the oil in the mixer oil reservoir is low or if the mixer oil line - from the mixer to the reed assembly - is removed, it is necessary to bleed the system. This must be done to avoid damage caused by the engine running with air in the mixer oil system.
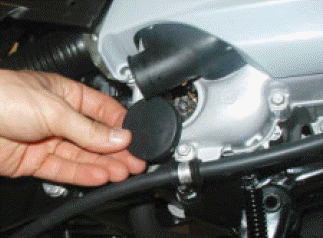
- Remove the lower cover, see (REMOVING THE LOWER COVER).
- Remove the rubber plug.
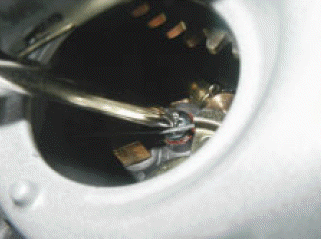
- Using a screwdriver, loosen the screw inside the mixer.
- Oil is drained by gravity; allow for the oil to flow out without air bubbles.
- Tighten the screw.
- Refit the cover.
MIXER OIL IE50
TOPPING UP
CAUTION The vehicle fits a control unit that manages an electronic pump controlling the correct quantity of oil for engine lubrication.
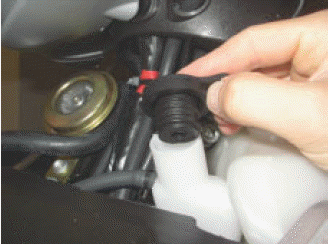
- Remove the front cover, see (REMOVING THE FRONT COVER).
- Remove the plug.
- Fill with oil, see (LUBRICANT CHART)
- Refit the plug.
AIR BLEED
CAUTION The vehicle fits a self-bleeding electronic pump.
If the oil in the mixer oil tank is low or if the mixer oil line - from the mixer to the reed assembly - is removed, it is necessary to bleed the system. Proceed as follows:
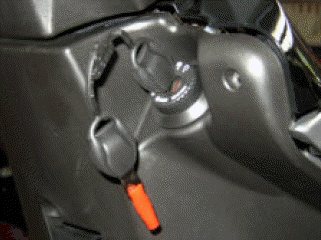
- Completely open the throttle grip.
- Keep the throttle open, turn the key to ON.
- You will hear the noise of the pump.
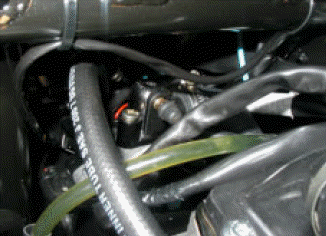
- Look at the mixer oil line going from the mixer to the reed assembly and keep the throttle completely open until the line is full of oil.
- Release the throttle twistgrip.
- If necessary, top up with mixer oil as described above.
See also:
 Aprilia SR50R - Service manual > Specifications
TECHNICAL DATA
 BMW R 1250 RT
 Kymco Agility 50
 Piaggio Liberty 50
 Yamaha aerox NS50
 Aprilia SR50R
 Kymco Agility 50
 Vespa Primavera 50
 Peugeot Speedfight